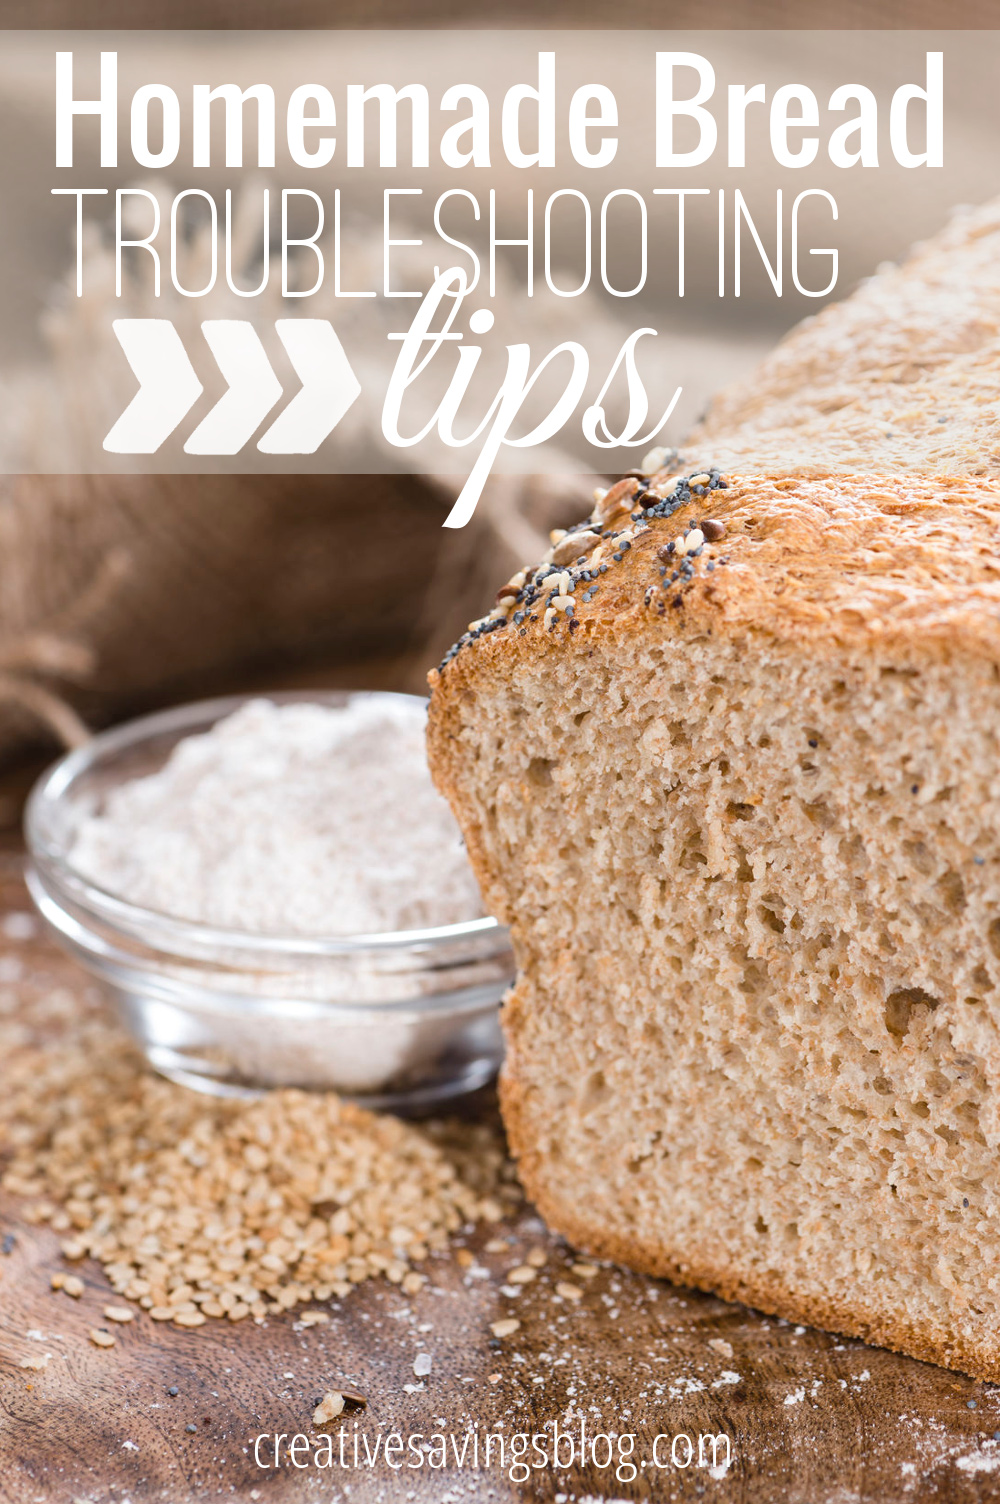
Homemade Bread Troubleshooting Tips
This post may contain affiliate links. Read my full disclosure policy here.

Over the past month though, I’ve been reading and studying how bread works, and have tried a few things with much success. So I thought I would share those with you today, and leave the comments open for a homemade bread forum so to speak.
The bread-making ninjas out there can share all their tried-and-true tips, and we can learn from their wise words and experiences. You also might want to pin this post to your breadmaking board to reference later!
First off, let’s dive right into the 2 most common problems that can accompany homemade bread:
- Not rising enough, making for some extra small loaves
- Too crumbly in the middle and falling apart
1. Bread not Rising Enough
I didn’t realize I had a problem with rising bread until we moved to an air-conditioned apartment in Florida. Nothing rose, at all! It killed my bread-making groove. But it wasn’t just the lack of heat that ruined my loaves though — yeast was whole other culprit I had to learn about too.
- I strongly recommend you buy Rapid-Rise Yeast over Active-Dry. I’m not really sure why it works better and faster, but it’s a lot more forgiving and costs the exact same no matter which one you use.

- Make sure your water is lukewarm — not too cool, and not too hot. Cool water won’t activate the yeast enough, and hot water will kill it. You may even want to use a candy thermometer to get the temperature just right. I know that kind of sounds like overkill, but many flopped rising attempts later, I’m a total convert!
- Keep yeast in the fridge to extend it’s shelf life, and if you’ve had the same package of yeast for a while, test the yeast using this method to make sure it’s still good. Although to be honest, I almost never do this and then feel awful for ruining an entire loaf….or two!
- For rising, turn your oven on warm and place bread inside for 5 minutes. Then turn off the oven. This gives your loaves just enough warmth to get started. You can also place your bread in a screened in porch if it’s warm outside.
- Always place a towel over your dough when it’s rising. This not only keeps the dough from drying out, it also keeps the warmth generated from the yeast inside. I’ve been doing some reading on creating a tent/sauna with a plastic bag over a Kitchen-Aid Mixer, but haven’t tried this method yet. Have you?
2. Bread too Crumbly
They key to a bread that’s not too dense, but not too crumbly, lies within a variety of factors, which it totally not helpful, I know, because sometimes you never know which one it is! Despite that teensy little problem, here are a few things to be aware of:
- Use a good bread knife. I own this exact one, and love that it cuts cleanly, smoothly, and doesn’t cost much at all. I actually have two bread knives, but one definitely works better than the other, and I can tell the difference in quality.

- Be careful of too much flour in your recipe. Always measure exactly when you are baking, and if the bread is too crumbly after cooling, try lowering the flour amount by 1/4 cup to start. You also might want to try Bread Flour instead of All-Purpose for a better texture.
- Don’t let the dough rise too long. Be sure to follow the recipe for rising time, and if it doesn’t rise enough, go back to Troubleshooting tip #1 to check your yeast, and your surrounding temperature.
- Make sure you knead your bread long enough if you’re doing it by hand. I usually don’t have a problem with this one as I let the breadmaker do all the work {more on this soon}, but the main thing is to make sure your are stretching the gluten in the bread so a result is a soft and chewy loaf. Kristin from The Frugal Girl, whom I consider a bread-making expert, has a great post on Kneading and Gluten Basics.
A Few Other Hacks to Mention
- Use the Oven and Bread Machine Together. Bread machines always create huge loaves that are way too big for sandwiches or just plain eating {in my opinion}. So if you don’t want to knead your dough, pop all the ingredients into your bread machine on the dough setting. You may want to hold back some of the flour to see what the texture is after it’s all mixed. When the dough is done, take out for a final rise, then let the oven finished baking your nice {normal-sized} loaves!
- Shape your loaf and place down in the pan seam side down. Sometimes I get lazy and don’t do this, then wonder why I have sorely misshapen loaves. Ay yi yi!
- Cool your bread completely before cutting it. This develops the flavor and texture of the bread even more, and allows for much easier, and cleaner slices. Remember to use a good bread knife like I mentioned above too.
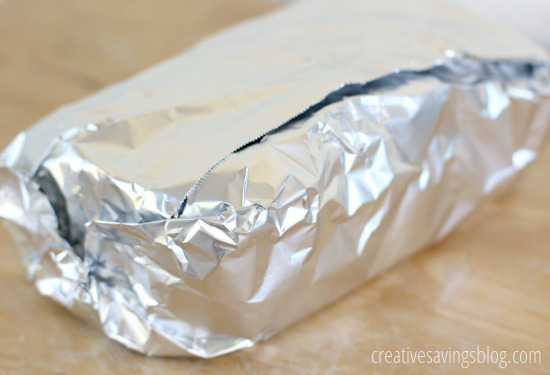
- Store your bread in the freezer with a layer of plastic wrap, then foil. The double barrier keeps your loaves fresh and tasty. Plus you can make a whole bunch at one time. Always make sure you slice the bread before you freeze it though. It makes for quite the mess when you want a simple sandwich!
I know there are so many more things we could talk about when creating that perfect loaf of bread, but this is about the extent of what I know. So please, share your awesome tips in the comments so we can compare notes!
As as extra resource, I’d recommend investing in A Passion for Baking. It’s one of my favorite cookbooks, and even though it’s not exclusively about bread, Marcy Goldman has a ton of great information to share about the bread-making process, and she makes everything really easy to understand too.
Happy Baking!
Do You Have Any Other Bread-Making Tricks to Share?
– – – – –
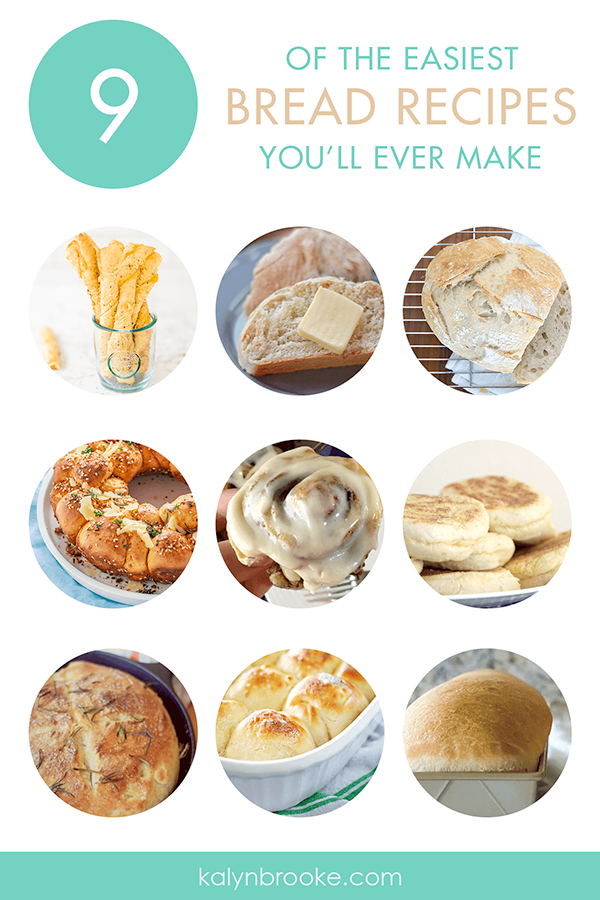
Jumpstart your own bread-baking with one of these 9 scrumptious recipes:
Disclosure: Some of the links in the post above are affiliate links. This means if you click on the link and purchase the item, I will receive an affiliate commission. Regardless, I only recommend products or services I use personally and believe will add value to my readers. Read my full disclosure policy here.
A common problem I have is a thin area of the bread towards the bottom will be more dense. Any suggestions?
Hi Kristi, I’m sorry you’re experiencing that issue! I’m not entirely sure what would be causing that. Since I can’t give you a great answer, it might be best to do some research on your own!
My batter bread falls in the middle when I take it out. I live in Florida!
Oh that’s so frustrating! You may want to try adding a little less water to the dough.
This is exactly what I am finding. I will try your tips the next time. Thank you for sharing !
I hope they work for you! Bread can be such a tricky adventure.
I usually have problems about bread not rising enough. Thanks for your tips, I can solve all the problems!
Awesome, this is exactly what I am finding. I will try your tips the next time I bake my bread. Thank you for sharing this!
You’re welcome, Anthony. Happy bread making!
What type of bread pan do you prefer? I have both glass and metal.
Hmmm…..I do feel like the metal help brown the edges a little bit more than glass, so that’s probably what I would go with if I had to make a choice.
I use the bread machine-microwave combo when making bread 🙂 Great tips!
To keep your flour fresh you can store it in the refrigerator. I do this all the time with the special (i.e., expensive) flours that I buy. It helps a lot, but does start some head-butting with my fancy beer-drinking husband for precious fridge space. 😉
Haha – great tip! It would also keep some of those critters out if you have any problems with bugs or mice.
Hi,
I’m a bit behind on this as I just found out about it but I was doing this anyway lol.
My problem my bread is rising to much :O
I borrowed Mum’s two year old bread maker & so far have made 3 loaves. The first one was ok but I didn’t have all the ingredients the manual said to put in. I brought all the recommended products & now the last to times the dough has risen so much I’m cleaning u a big mess.
The second loaf & first time with powdered milk & bread improver I figured I put in to much yest but then the third time it did the same thing.
So I’m confused lol.
I would definitely try decreasing rise time. The temperature in your home or kitchen may be on the warmer side, and you should go by the look of the dough, not the clock. You also might try using an active-dry yeast if you were using rapid-rise. Let me know if this works!
For rising- you can also steam up the microwave by boiling water for a minute, then remove it and put the covered bowl of dough in to rise.
That’s such a neat idea – thanks for sharing, Beth! I bet it would save a lot on energy too if you use the microwave instead of turning on the oven.
I sometimes do a variation on that…I boil a cup or so of water and then put that in a container on the bottom of the oven. Then I have a nice large, warm area where I can put multiple trays of rolls or buns to rise.
(My microwave is kinda small so I couldn’t fit much in there!)
Ooh, that WOULD be nice if you had a bunch of bread and rolls to rise. Thank you for stopping by with your tips, Kristen! I’ve admired your blog for years now. 🙂