DIY Car Upholstery Cleaner
This post may contain affiliate links. Read my full disclosure policy here.


Before the Fall season sets in though, I usually like to do a very thorough deep cleaning of the car. So many things accumulate in there during the year, not to mention icky crumbs, wadded up napkins, and who-else-knows-what shoved under the seats. It can be pretty scary sometimes!
But I was determined to clean absolutely everything, right down to the nooks-and-crannies.
In searching for some cheap DIY cleaners in one of my favorite homemaking books, I was excited to find recipes to clean the upholstery, and vinyl interior.
The vinyl cleaner required a few supplies I didn’t have, so rather than buy them, I just used hot water and rags to scrub off the dust and crumbs. It worked great!
For the upholstery cleaner, I found it was super easy to throw together, and you probably have most of the ingredients right in your home. It really works too – it totally fixed a chocolate stain. Have no idea who that might have been…ahem.
How to make your own DIY car upholstery cleaner
You actually only need 3 ingredients – soap flakes, borax and boiling water. Easy, right?
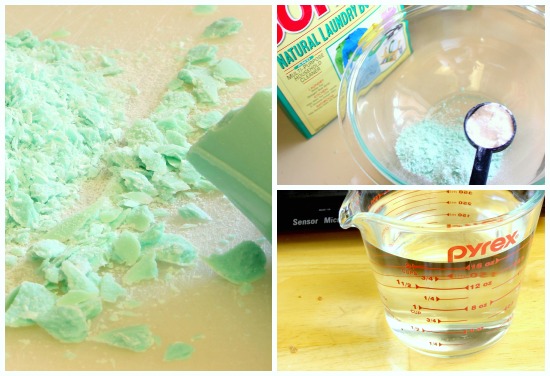 First, grate a bar of soap to make 6 tbsp of soap flakes. And yes, I did use the kitchen grater, but no worries….I cleaned it really well before using for food!
Then mix the soap flakes and borax together, add in the boiling water, and stir to dissolve.
The only pain about this recipe, is you do have to wait for everything to cool before you use the cleaner, but you should probably clean out the rest of the car first, and shampoo the upholstery as the very last thing anyway.
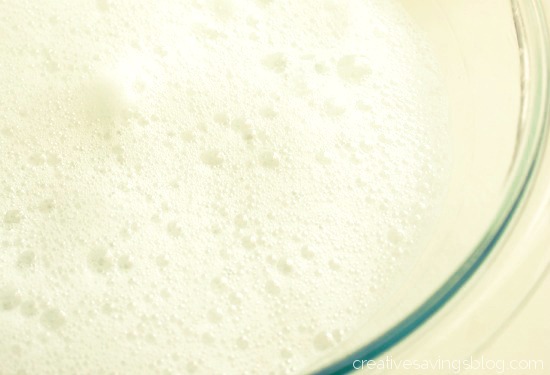
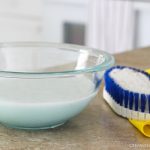
When the cleaner is completely cool, whip it into a foamy consistency and it’s ready to use!
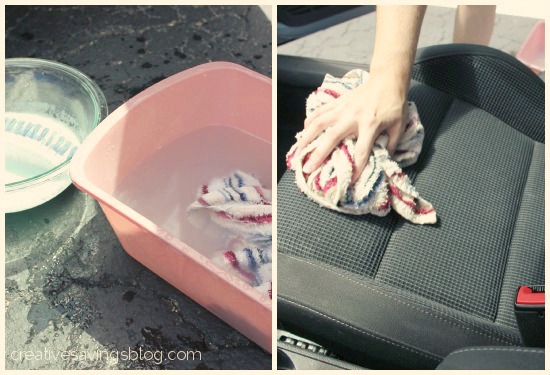
I started by brushing the cleaner onto the car upholstery with a bristle brush. You should only work on one seat at a time, because you don’t want the soap to just sit on the fabric and start to dry.

At this point, the recipe told me to wipe the soap away with a damp sponge, but I disagree. It only smears the soap and makes a worse mess!
A wet rag that you can keep rinsing in a bucket of water is the way to go, and worked wonderfully.
Ready to see the before and afters?
You might not be able to really tell from the pictures, but this cleaner did an absolutely amazing job! I couldn’t stop commenting about it for a straight week after we had cleaned the car. Joseph will testify.
 As for the leftover upholstery cleaner, I couldn’t really reuse it because I kind of left it out in the Florida sun and it turned to a gak-like substance. I’m not even sure they make that stuff anymore, but it was kinda gross. {shudder}
Here’s the recipe if you’d like to clean your own car on the cheap:
Print
DIY Car Upholstery Cleaner
- Total Time: 11 minutes
Ingredients
- 6 tbsp soap flakes
- 2 tbsp borax
- 2 cups boiling water
Instructions
- To make the soap flakes, lightly grate a bar of soap on a coarse kitchen grater.
- In a large bowl, mix the soap flakes and borax together. Slowly add the boiling water, stirring well to thoroughly dissolve the dry ingredients.
- Let cool, then whip into a foamy consistency with a whisk or egg beater.
- Brush suds onto furniture with a bristle brush, concentrating on soiled areas. Quickly scrub away with a wet rag.
- Prep Time: 11 minutes
This DIY car upholstery cleaner was completely free for me to make, since I already had all the ingredients, but a box of Borax could cost you about $7-$12 dollars depending on size.
Still, you’re really only spending a few pennies on this concoction, which is a steal compared to cleaners from the store!
Have you ever tried cleaning your car interior at home?
Disclosure: Some of the links in the post above are affiliate links. This means if you click on the link and purchase the item, I will receive an affiliate commission. Regardless, I only recommend products or services I use personally and believe will add value to my readers. Read my full disclosure policy here.
[embed_popupally_pro popup_id=”9″]
Thanks Kalyn !
Is this a process that is good to use when the upholstery is especially nasty after a long summer of swimming, semi wet seats from semi dried suits, and no A/C? My upholstery has never been so overall stinky and stained and just plain dingy. Is there a better process to use for a really dirty car? I feel toothbrushes and vinegar may not be quite enough.
Oh, I thought I was the only one that had a yucky car! I am so excited to see this recipe. I will let you know how nice my car looks and smells when I clean it. Thank you so much.
Dianne, aka Katie’s Mom
Yes! Please report back. I need to whip this up again for our car….after our road trip it’s starting to get that “well traveled” smell. 🙂
This even works fairly well on stubborn grease stains (I’m a mechanic, so my upholstery takes a bit of a beating)… I used a nail brush to work the solution in, pretty impressed with the results!
Thanks for coming back to let me know, Simon. I love it when readers give feedback on DIY recipes that I put on the website!!
Between my two boys, I have the juice of watermelon-gone-sour soaked into my backseat and floorboards….does this concoction help with smell and whatnot also??
I’m sure it wouldn’t hurt…I would definitely give it a good scrubbing and then if the smell was still strong, I might try scrubbing in the essential oils I use for my husbands sweaty laundry. https://kalynbrooke.com/cleaning-organizing/remove-odor-from-clothes/
i am looking for a leather cleaner to remove black spot from my white leather car set. please suggest some good product.
I’ve worked with Leather before – so I can’t really help you out in that department. This website be able to help: https://www.hgtv.com/lifestyle/clean-and-organize/how-to-clean-leather-car-seats
Awesome! My husband will be astonished! He really likes this kind of homemade products! They are not only easily affordable but also effective! It neither harm the environment, nor our health! Thank you for sharing!
You’re welcome, Leslie!
Has anyone tried this on denim sofas?
Not that I know of, Shirley, but if you do decide to give it a try, I might test it on a corner of the couch that you can’t see first. Just to make sure it doesn’t ruin anything!
I bought a cheese grater (the kind with the hand crank that they use for your salads in restaurants) just for this purpose! I actually just get a few bars and the kids love to help! I cute the soap up so it will fit on the slicer and it couldn’t be easier! I usually only have to do this once a month and the shredded soap goes into a large lidded container to use for whatever cleaning solution I need!
A cheese grater specifically for soap is something I could definitely use! There are so many homemade recipes that call for it. 🙂
Several months ago, I tried your recipe on my microfiber car seats and it worked like a charm. However, I had mixture left over which I hated to throw away. My solution was to freeze it. Fast forward many months. A new spot on my seat appeared and I decided to see how the mixture stood up to freezing temps. Verdict? Just great. It still had the same fluffy texture and the same level of effectiveness. Thanks!
That is awesome to know that this cleaner freezes well! Did you let it thaw on it’s own, or put it in the microwave?
What is borax? I have never heard of that here in NZ. Are there any alternatives? Thanks!
It’s a natural cleaning booster — at least that’s the best way I can describe it! I wonder if Amazon might be able to ship to NZ? http://amzn.to/1EmBGvr If not, baking soda has similar properties and might be a good switch!
Borax is sodium elaborate.
This is the same recipe for laundry detergent that I make. Works great on getting clothes clean. You just have to add baking sada.
I use washing soda not baking soda for my laundry.
I was thinking that using Zest would make it smell a lot better than the Naptha. I’m not much of a fan of the Naptha smell.
If you use the Zote bars they smell much nicer than the Fels Naptha soap. I use the Zote when I make our laundry detergent and it’s a very nice and fresh smell. Hope that is helpful
Ahem…what exactly IS gak?
When I was a kid, it was a squishy substance that I thought was really gross to touch, but boys usually liked playing with it. Here is an example.
The food processor with the grating attachment works really well for the soap too (and is super fast!). I hate the knuckle buster hand graters. [Also, not sure if this matters since you mentioned that you used Zest, but…] I had read on a site for making laundry detergent that the reason you use a “pure” soap like Ivory or Fels Naptha is because the regular bath soaps can have varying levels of oil in them that can leave a residue.
I actually just got a Ninja over Christmas, so the next time I make this recipe I will have to try that out! And that makes complete sense about the soap.
I was wondering if this is good for stains as my kiddies have really stained the back seat of my car
really bad with melted chocolate. I was thinking about using peroxide. I used a spot bot steam cleaner with
tide and it didn’t do the trick.
Thank you.
We had a little bit of melted chocolate on one of the seats as well, and it surprisingly came off with this cleaner. It had been baked in the sun and everything! Just use a brush or rag and scrub it pretty hard.
did u use this for the carpet also?
I would if there are stains, but ours weren’t too bad so we just vacuumed the floors and mats.
Does it matter what soap you use, for soap flakes?
Well, the recipe recommends a pure soap, like Ivory, but I didn’t have a bar of it on hand, so I used Zest. If you’re not sure how a different kind of soap will react to the upholstery, I would do a test on a small area, or buy a bar of Ivory just to be safe. Hope that helps!
Do you think something like Dawn would work instead of soap flakes?
I think Dawn would be OK to use, but perhaps just not as much. I would experiment with a little at a time, since Dawn can get really sudsy! You would also want to dilute it more with water, because Dawn is more of a detergent rather than a soap.
Possibly use Dr. Bonner’s Castille soap? It’s all natural too 🙂
That would be a great option to try!
thanks I have been trying to make my own solutions instead of buying products with chemicals and it saves you money
I’d love to be able to make a few more “from-scratch” cleaners…just have to find the time to actually do it!
This is great, just what we need in our house!
Having a clean up plan is always easier than trying to KEEP it clean when you have a toddler!
Thanks:)
Yes – being organized helps so much!
I don’t clean out my car – I let my husband do it, LOL. This is a great recipe and I will pass it along to him!! Thanks for sharing!!
Well, I do make my husband vacuum it out, so I can’t take all the credit! 🙂